Oven not heating properly — troubleshooting steps before you call for repair

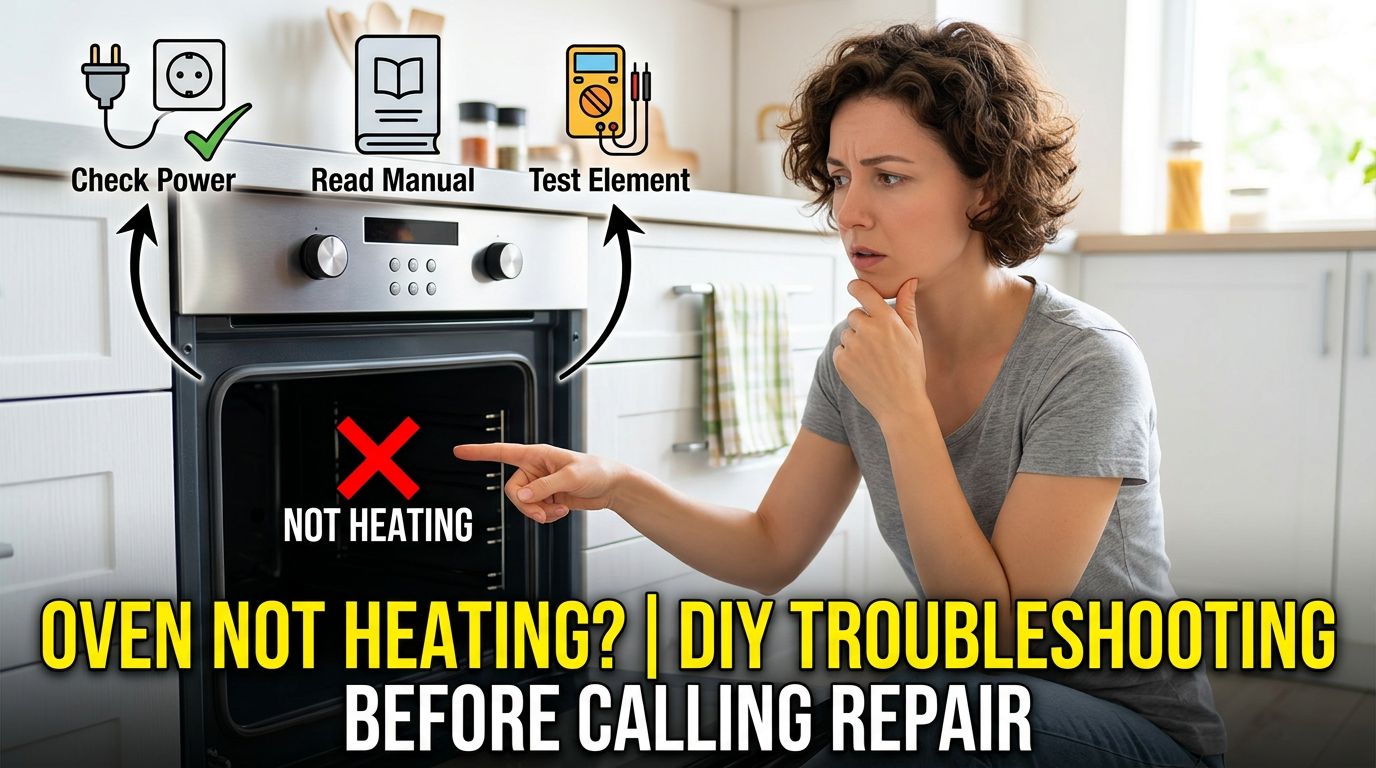
Your oven was preheating fine last week, and now it’s taking forever to reach temperature or it’s not getting there at all. This guide walks you through the most common reasons an oven stops heating properly and the steps you can take right now, before picking up the phone.

A cold oven is more than an inconvenience. Dinner’s on the line, and you’re standing there wondering if this is a quick fix or the beginning of something expensive. The good news is that many heating problems come down to a handful of common causes, and several of them are things you can check or address yourself with basic tools and a bit of patience.

At Abbotsford Appliance Repair Pros, we field a lot of calls from homeowners across Abbotsford who assume the worst the moment their oven acts up. More often than not, the issue turns out to be something straightforward a tripped breaker, a burned-out bake element, or a temperature sensor that’s drifted out of calibration. That said, some problems do require a professional, and knowing the difference can save you both time and money.

[IMAGE PLACEHOLDER FOR IMAGE1]

Key takeaways

  • Most oven heating problems come down to a failed heating element, a faulty temperature sensor, or an electrical issue all of which can be diagnosed before calling for repair.
  • A working bake element should glow red within a minute or two of turning the oven on; if it doesn’t, that’s your first clue.
  • Replacing a standard residential heating element typically costs between $25 and $77 for the part alone, and between $150 and $400 if you hire a professional for parts and labor combined.
  • If repair costs exceed half the price of a comparable new oven, replacement is usually the smarter financial move especially for ovens over 15 years old.
  • Gas oven problems involving ignition or temperature should be handled by a qualified technician; never attempt gas-related repairs without proper training.
  • Always disconnect power before inspecting or replacing any internal oven component.

oven not heating properly repair guide infographic

Why your oven isn’t heating the way it should

When an oven stops heating properly, it’s almost always one of a few culprits: the bake element, the broil element, the temperature sensor, or the control board. For gas ovens, the igniter is usually the first thing to suspect. The good news is that each of these can be checked methodically, starting with the simplest possibilities and working toward the more complex ones.

Uneven cooking, extended preheat times, food that’s burned on top but raw in the middle, or an oven that simply won’t reach its set temperature all of these point toward a heating issue rather than a problem with the food itself. We see this fairly often, and the symptoms usually give you a solid clue about where to look first.

One thing worth mentioning: Abbotsford’s mix of older ranchers and newer developments means we run into a wide range of oven ages and models. Older homes, particularly around West Abbotsford, often have appliances that have never had a proper service. A heating issue in a 20-year-old oven might just be a worn element but it could also be part of a broader pattern of decline worth paying attention to.

broken electric oven heating element inspection

Start here: the quick checks before anything else

Before you pull the oven out from the wall or order any parts, run through a few basic checks. These take five minutes and sometimes solve the problem completely.

First, check your circuit breaker. Electric ovens run on a 240-volt circuit, and it’s not uncommon for one leg of that circuit to trip while the other stays on. This creates a strange situation where the oven powers up and the display works, but the heating elements don’t get full power. Go to your electrical panel and look for a breaker that’s tripped to the middle position. Reset it fully off, then back on. If it trips again when the oven heats up, you’ve got a wiring issue that needs a professional.

Second, check the oven’s clock and settings. Some ovens have a “Sabbath mode” or a delay-start feature that can accidentally get activated, preventing normal heating. If your oven’s display looks different than usual, consult your manual. It sounds basic, but this trips up more people than you’d expect.

Third, if you have a gas oven, make sure the gas supply valve behind the unit is fully open. If you’ve recently had work done in your kitchen or someone moved the appliance, the valve may have been partially closed.

multimeter testing oven temperature sensor

Checking the heating elements on an electric oven

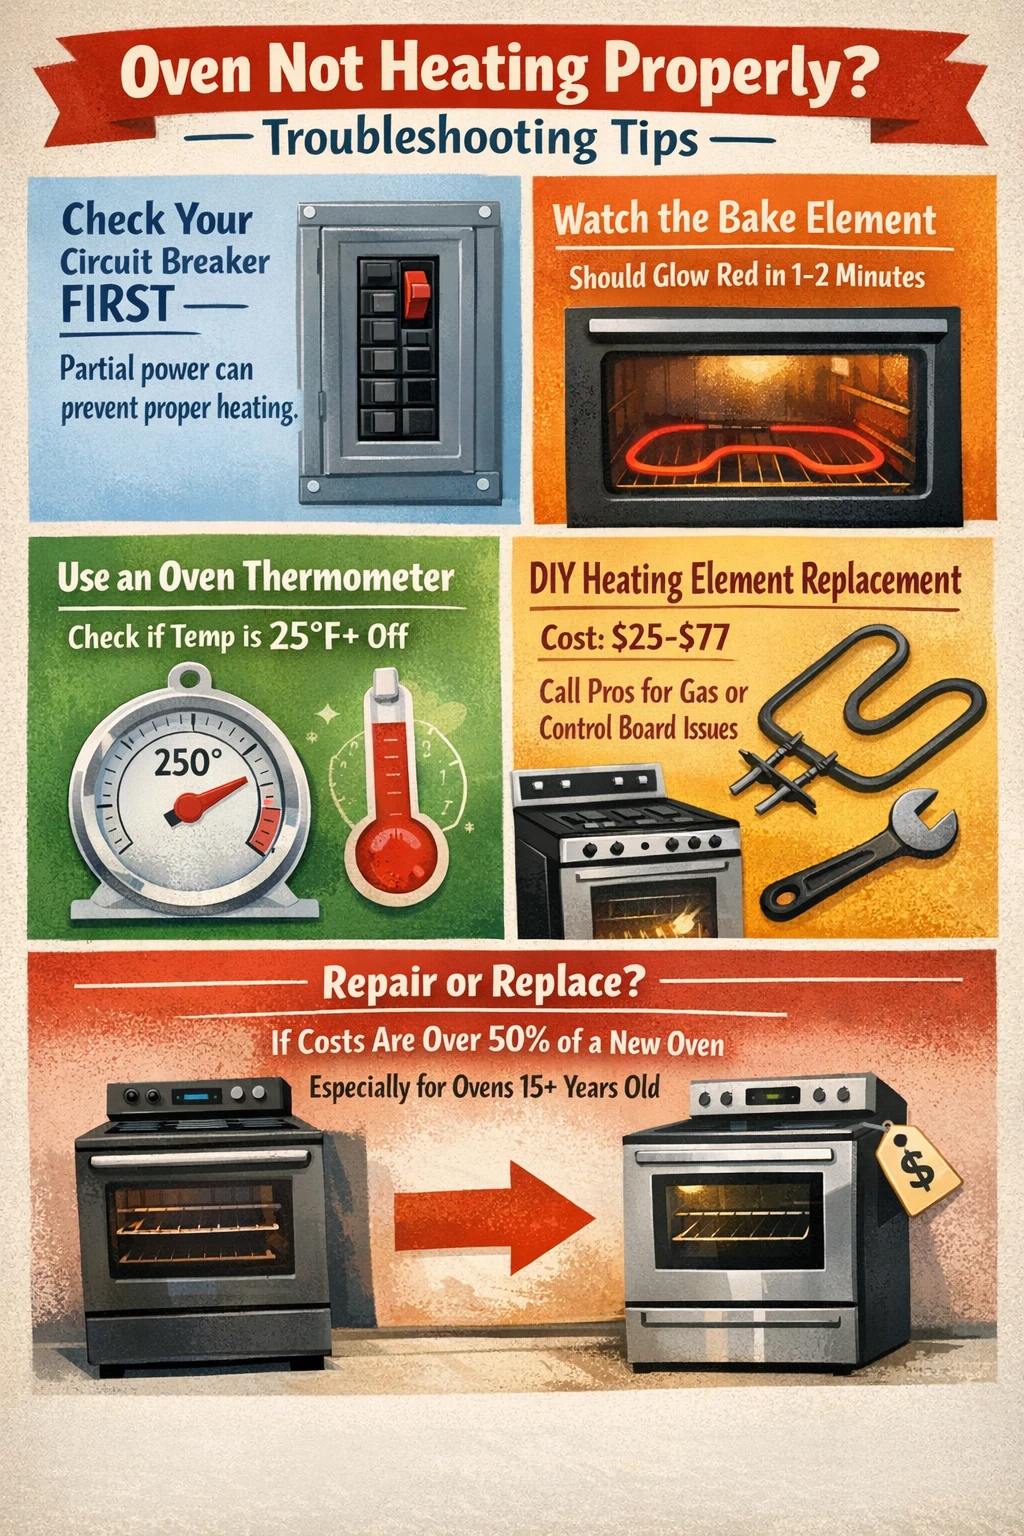
For electric ovens, the heating elements are the most common point of failure. There are two: the bake element at the bottom and the broil element at the top. They’re relatively easy to inspect visually, and a failed element is usually one of the least expensive oven repairs you’ll make.

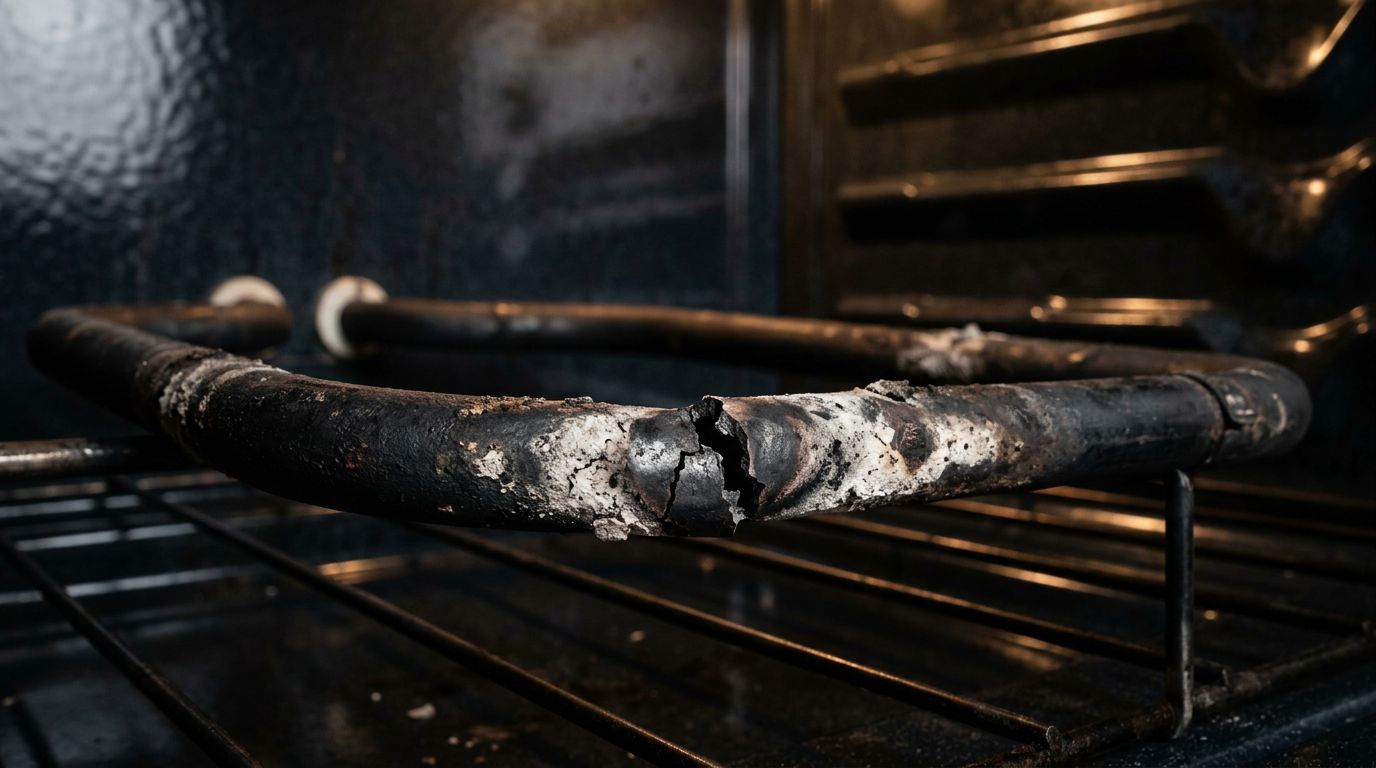
Turn the oven on to a bake setting and watch the bottom element through the oven window. Within a minute or two, it should start glowing red. If it doesn’t glow at all, or if it only glows in patches, the element has likely failed. Visible damage makes it even more obvious look for cracks, burns, blisters, or sections where the element is clearly broken. A healthy element looks uniform and glows evenly.

If the element looks intact but you’re still not getting heat, you can test it with a multimeter. With the oven unplugged and the element cooled completely, disconnect the wires at the back of the element and touch your multimeter probes to the terminals. You’re looking for continuity. No continuity means the element is broken internally, even if it looks fine. Standard residential elements for brands like Whirlpool, GE, Kenmore, and Hotpoint typically run between $25 and $77 for the part. Most homeowners with basic tool experience can handle this replacement themselves it’s a screwdriver job for most models.

A word of caution: ovens run at 240 volts and 30 amps. Always unplug the oven or turn off the breaker before touching anything inside. This isn’t a situation where “probably off” is good enough.

[IMAGE PLACEHOLDER FOR IMAGE2] appliance repair technician fixing modern oven

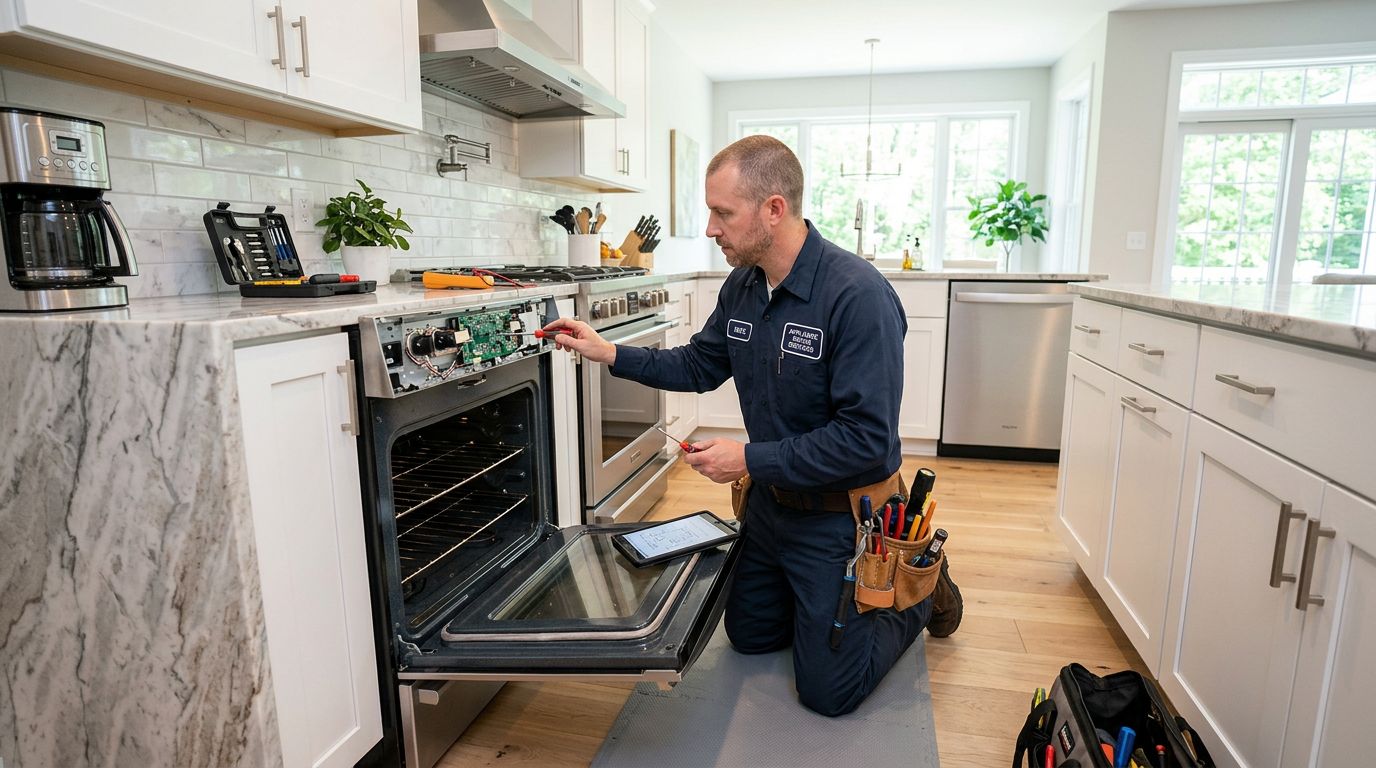
What to check on a gas oven

Gas ovens heat differently, and their failure modes are different too. The igniter is the part that fails most often, and it’s responsible for both lighting the burner and allowing gas to flow. When an igniter gets weak, it may glow but not get hot enough to open the gas valve so you’ll wait for preheating that never quite arrives, or takes two to three times longer than it should.

To check the igniter, turn the oven on and watch through the bottom vent or remove the oven floor panel to see the igniter directly. It should glow bright orange within 30 to 90 seconds and then ignite the burner. If it glows faint orange and just sits there, or if it takes more than 90 seconds to light, the igniter is likely weak and nearing the end of its life. Replacement is usually a straightforward job, but it does involve working near gas components.

If you smell gas at any point during this process, stop immediately. Don’t try to light the oven, don’t flip switches, and ventilate the space. This is not a DIY situation. A suspected gas leak needs immediate attention from a qualified technician or your gas utility company. You can find guidance on gas safety from the National Fire Protection Association, which covers what to do if you suspect a gas appliance problem.

The temperature sensor: often overlooked, easy to check

If your oven heats up but the temperature is off say, it runs consistently hotter or cooler than the setting, or food takes noticeably longer to cook than recipes suggest the temperature sensor is worth investigating. This is a thin probe, usually mounted at the top rear of the oven cavity, and it tells the control board what temperature the oven has actually reached.

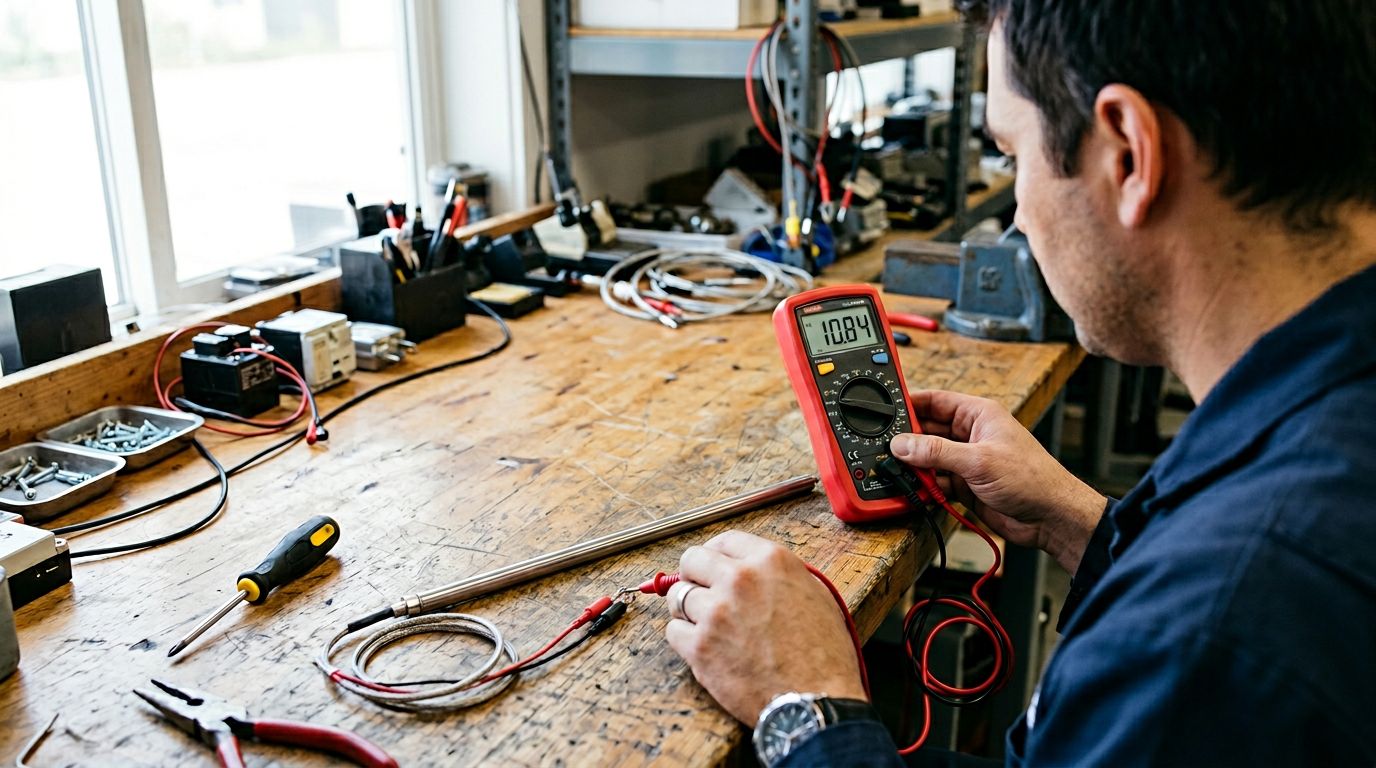
A sensor that’s gone bad can cause your oven to undershoot or overshoot its target temperature consistently. You can do a rough test by placing an oven thermometer inside and running the oven at a set temperature for 20 minutes after it signals it’s preheated. If your thermometer reads 25°F or more off from the setting, either the sensor or the thermostat is the problem. An oven thermometer costs just a few dollars and gives you real data rather than guessing.

Testing the sensor with a multimeter is also possible. At room temperature, most oven temperature sensors read around 1080 to 1100 ohms of resistance. Check your oven’s service manual or look up your model number online to confirm the expected value. If the reading is far outside the expected range, the sensor needs replacing. This is usually a low-cost part and a fairly simple swap.

We get a fair number of calls from homeowners in Clearbrook who’ve replaced their heating element, only to find the oven still wasn’t hitting the right temperature. Often, a sensor that was borderline before goes the rest of the way out shortly after. Replacing both at once saves a second service call.

When it’s the control board (and how to tell)

The control board is the brain of the oven. It receives input from the sensors and sends signals to the elements or igniter. When it fails, the symptoms can be hard to pin down erratic temperatures, elements that don’t turn on even though the sensor and wiring are fine, error codes on the display, or a completely unresponsive oven.

Control board failures are less common than element or sensor failures, but they do happen, especially in older ovens with electronic controls. If you’ve checked the element, the sensor, and the wiring connections and everything looks fine, the control board is the next suspect. Diagnosing it properly usually requires a technician with the right tools replacing it blind is expensive and not always necessary.

Honestly, a control board repair or replacement on a basic oven can run $200 to $400 or more for parts alone. At that point, you’re doing some real math. If the oven is under 10 years old and otherwise in good shape, it’s usually worth fixing. If it’s pushing 15 years or older and this isn’t its first problem, a new oven starts to make more financial sense. The rough rule of thumb used by most appliance professionals: if the repair costs more than half what a replacement oven would cost, replacement is usually the better long-term decision.

Frequently asked questions

These are the questions we hear most often from homeowners dealing with oven heating problems. Some of the answers might surprise you.

Can I still use my oven if the broil element is out but the bake element works?

In most cases, yes you can bake normally with just the bake element functioning. The broil element handles high-heat top cooking and also assists during preheating in some ovens. If your oven takes longer to preheat but otherwise heats evenly, a failed broil element is a likely cause. It’s worth getting it replaced, but it’s not an emergency.

My oven beeps and says it’s preheated, but it’s not actually hot enough. What’s happening?

This is almost always a temperature sensor issue, or the oven’s calibration has drifted. The oven’s control board is trusting a sensor that’s giving it a false reading, so it signals “ready” before the temperature is actually there. Use an oven thermometer to confirm how far off it is. If it’s consistently 25°F or more below the set temperature, a sensor replacement or thermostat calibration is the likely fix.

How do I know if it’s worth repairing or if I should just buy a new oven?

Start with the age of your oven and the estimated repair cost. Ovens typically last 10 to 15 years. If yours is less than 10 years old and the issue is isolated to a single component an element, a sensor, or an igniter repair almost always makes sense. If your oven is older than 15 years and you’re facing a repair that would cost more than half the price of a comparable new unit, replacement is usually the smarter move. A new standard freestanding oven runs roughly $600 to $1,300 before installation, so you can do the comparison fairly quickly.

Is oven troubleshooting something I should do myself, or should I call a technician?

Visual checks, basic multimeter testing, and simple part replacements like a bake element are well within reach for most homeowners who are comfortable with basic tools and are careful about disconnecting power first. Anything involving gas components, wiring beyond the element terminals, or the control board is better left to a professional. If you’re ever unsure of what you’re looking at, it’s not worth the risk a misdiagnosis can mean more damage or a safety hazard.

Does replacing a heating element improve how efficiently my oven runs?

Yes. A degraded or partially failed element forces the oven to work harder and longer to maintain temperature, which wastes energy and adds time to every cook. A new element restores proper temperature cycling, which means faster preheating and more consistent results. The U.S. Department of Energy’s appliance guidance notes that properly maintained appliances use significantly less energy than those in poor repair.

[IMAGE PLACEHOLDER FOR IMAGE3]

Wrapping up

An oven not heating properly is rarely a reason to panic but it is a reason to act. Start with the easy checks: the breaker, the element, and the temperature sensor. Most problems fall into one of these categories, and many are fixable without a service call. If the oven is older, or if multiple things are going wrong at once, take a hard look at the repair-versus-replace math before committing to an expensive fix. At Abbotsford Appliance Repair Pros, we handle oven and stove repair regularly across Abbotsford and the surrounding area from a straightforward element swap to a proper diagnosis when the problem isn’t obvious. If you’d rather not work through it yourself, or you’ve done the checks and still can’t pin it down, give us a call and we’ll help you figure out exactly what’s going on and what it’ll take to sort it out.

Dishwasher not cleaning dishes properly — common causes and fixes

You run the dishwasher, wait through the whole cycle, open the door and the dishes still look like they skipped the whole thing. This guide walks you through the most common reasons a dishwasher stops cleaning properly and exactly what to do about each one.
Nobody wants to hand-wash a full load of dinner dishes at 9pm. The whole point of the machine is to handle that for you. At Abbotsford Appliance Repair Pros, we hear from homeowners across Abbotsford regularly about poor dishwasher performance, and the good news is that most of the time, the fix is simpler than people expect. A bit of maintenance, maybe a tweak to how the machine is loaded or what detergent you’re using, and you’re back in business.One thing worth knowing about this area: Abbotsford’s water tends to run harder than a lot of people realize. That mineral load builds up inside dishwashers over time and is one of the more common reasons we see machines that were working fine start leaving dishes spotty, filmy, or outright dirty.

Key takeaways

  • A clogged filter is the single most common cause of a dishwasher not cleaning dishes clean it at least once a month with a soft brush under running water.
  • Spray arm holes can be cleared with a toothpick; if the arms won’t spin freely, no amount of detergent will help.
  • Water entering the dishwasher should be around 120°F for detergent to dissolve and activate properly.
  • Running a cycle with 3 cups of white vinegar in an empty machine can clear light mineral buildup without any special products.
  • Improper loading overlapping dishes, nested spoons, tall items blocking the spray arms causes more cleaning failures than most people suspect.
  • If you’re hearing a hammering sound during a cycle, that often points to a failing inlet valve, which needs professional attention.

Dishwasher Not Cleaning Dishes Infographic Takeaways

Why your dishwasher isn’t cleaning dishes

The most common causes of a dishwasher not cleaning dishes are a dirty filter, blocked or clogged spray arms, water that isn’t hot enough, and loading problems that prevent water from reaching everything in the machine. Most of these are fixable at home without any tools. A few like a failing wash motor or a broken inlet valve do call for a technician.Think of it this way: a dishwasher is basically a very controlled water-spraying system. If anything interrupts the water getting in, getting hot, or getting where it needs to go, you end up with dishes that went through a warm rinse at best. Every cause on this list traces back to that same basic problem.In our experience, the filter is the first thing to check. It’s the most neglected part of the machine, and when it’s clogged, dirty water just recirculates. Dishes come out looking worse than they went in.

The dirty filter problem

Most dishwashers made after 2010 or so have a manual filter rather than a self-cleaning one. The older self-cleaning type ground food particles down automatically (and wasn’t quiet about it). The newer design is quieter but requires you to actually take it out and clean it periodically. A lot of people don’t know this.The filter sits at the bottom of the tub, usually right under the lower spray arm. You typically twist it counter-clockwise to unlock it, then lift it out. The first time you do this after neglecting it for a while well, fair warning, it can be pretty unpleasant. Rinse it under hot running water, use a soft brush to work out the gunk, and for stubborn calcium deposits, let it soak in warm soapy water for a few minutes before scrubbing. Don’t use anything abrasive or you’ll damage the mesh. Cleaning dishwasher filter maintenance Clean it once a month if you run the machine regularly. If there’s standing water an inch deep or more in the bottom of the tub after a cycle, a clogged filter or drain issue is the likely reason.

Spray arm problems and how to fix them

The spray arms are the rotating parts that actually fling water onto your dishes. Each arm has small holes (jets) along it, and if those holes get clogged with food debris or mineral scale, the water pressure drops and cleaning suffers. This is one of those dishwasher spray arm problems that looks complicated but usually isn’t.Start by manually spinning each arm. It should rotate freely with almost no resistance. If something stops it a tall pot, a baking sheet angled the wrong way, a glass that’s shifted that arm isn’t doing its job for that whole cycle. Reload and try again.If the arms spin fine but dishes are still coming out dirty, remove the arms and hold them up to a light. Clogged holes will be obvious. Use a toothpick or a thin piece of wire to clear each one, rinse the arm thoroughly, and reinstall. Unclogging dishwasher spray arm holes One thing worth checking: after starting a cycle, open the door after about 30 seconds and see whether the arm actually moved. A spray arm that looks fine but won’t rotate during operation usually means there’s a bigger issue with the wash motor or the diverter that’s when it makes sense to call someone in.

Water temperature and detergent issues

Hot water matters more than most people think. Dishwasher detergent especially the enzyme-based formulas in modern pods and tablets needs water around 120°F to activate and break down grease and food properly. If the water coming in is too cool, the detergent won’t dissolve right, and you end up with residue on everything.Check your water heater setting. It should be at 120°F. Any higher than that and you’re creating a scalding risk at the tap; any lower and your dishwasher is fighting uphill every cycle. If the water heater is far from the kitchen, run the hot tap at the sink for 30 to 60 seconds before starting the machine. That gets hot water into the line so the dishwasher isn’t filling with lukewarm water right from the start.On the detergent side, a few things trip people up. Using regular dish soap is a bad idea it creates suds that can foam out of the machine and onto your floor. Too much detergent causes residue buildup; too little and things don’t get clean. Pods and tablets generally outperform powder and gel for reducing film on glasses and dishes. One thing that surprises a lot of people: modern dishwasher detergents actually work better when dishes have some food residue on them, because the enzymes need something to cling to. Scrape big chunks off, but don’t pre-rinse everything spotless before loading.Rinse aid is also worth using if your dispenser has a spot for it. It helps water sheet off dishes instead of beading up, which reduces spots and improves drying. If you notice white film or spots on glasses after cycles, low rinse aid or hard water mineral buildup is almost always the reason. A simple fix is to run an empty cycle with a cup of white vinegar placed upright on the top rack it disperses through the wash and helps break down deposits. For more serious hard water buildup, the US Department of Energy has guidance on water heater settings and water quality that’s worth a look.

Loading mistakes that hurt cleaning

Honestly, this is one of those causes that feels too simple to be real, but it accounts for a surprising number of poor dishwasher performance complaints. How you load the machine changes how water moves through it.The basic rule: every item needs a clear path to the spray. Overlapping plates block each other. Bowls facing up collect water instead of letting it drain. Spoons and forks nested together especially in the cutlery basket end up with their handles and heads pressed against each other, and the water never gets to the contact points. Mix up cutlery types in the basket so things don’t stack. Properly loaded dishwasher racks example Tall items on the bottom rack are a frequent culprit. A cutting board or a large pot placed flat on the bottom rack can physically block the lower spray arm from rotating. Same goes for the upper rack: if it’s set too low and a bowl is in the way, the upper spray arm hits it and stops. The upper rack height is usually adjustable check your manual for how to do it on your model.Put cups, glasses, and smaller bowls on the top rack, angled so water drains off. Pots, pans, and plates go on the bottom where spray pressure is stronger. Bosch’s loading guidance is a good reference for getting the spacing right if you want a visual walkthrough.We get calls about this fairly often from homeowners around Clearbrook and West Abbotsford older homes in those areas sometimes have smaller dishwashers, and people end up trying to fit more than the machine can handle in one load.

When it’s something more serious

Most dishwasher cleaning problems are solved by the steps above. But sometimes the issue is a mechanical one that cleaning and reloading won’t fix.If the machine fills with water and sounds normal but dishes come out completely untouched wet but not clean the wash motor or the circulation pump may be failing. The water is getting in, but it’s not being pushed through the spray arms with enough pressure to do anything. That’s a repair job, not a maintenance one.A broken or jammed detergent dispenser is another possibility. If the dispenser door doesn’t open at the right point in the cycle, the detergent either releases too early (gets washed away before the main cycle) or not at all. Check the dispenser by running a cycle and opening the machine mid-wash to see if it’s opened. A jammed spring or cracked gasket around the dispenser door can often be fixed with a bit of cleaning and petroleum jelly on the gasket seal; if the door mechanism itself is broken, the part usually needs replacing.A failing inlet valve is worth mentioning too. It controls water flow into the machine. If you hear a hammering or banging sound during the fill cycle, that’s often a sign the valve is struggling. Lower-than-normal water volume in the tub after filling points the same direction. This one usually needs a technician it’s not a complicated repair, but it involves the water supply line and should be done right.In older homes around Matsqui Village, we sometimes see issues tied to aging supply lines and pressure fluctuations affecting appliances including dishwashers. If your water pressure seems off at the tap, that can carry into how the dishwasher performs.

Frequently asked questions

These questions come up again and again when people are troubleshooting dishes still dirty after dishwasher cycles. If you’ve been through the basics above and things still aren’t right, this section may point you in the right direction.

How often should I clean my dishwasher filter?

Once a month is a good target if you run the machine regularly. The filter catches food particles, grease, and debris from every cycle. When it gets clogged, dirty water circulates back onto your dishes instead of draining away. If you notice a gritty film on dishes or a bad smell coming from the machine, that’s usually a sign the filter needs attention sooner. The process takes about five minutes twist it out, rinse it under hot water with a soft brush, soak it briefly if there’s calcium buildup, and reinstall.

Why are my glasses coming out cloudy or spotted?

Cloudy glasses are almost always a hard water problem. Minerals in the water mainly calcium and magnesium deposit on glass surfaces during the wash and dry cycles. The fix involves a few things working together: keep your rinse aid dispenser filled (it helps water run off instead of sitting and evaporating on the surface), run a monthly vinegar cleaning cycle to clear interior mineral buildup, and consider a dishwasher-specific water softener additive if your water is particularly hard. Switching to a quality tablet or pod detergent rather than powder can also reduce filming noticeably.

Should I pre-rinse dishes before loading them?

Scrape off large food chunks, but don’t rinse everything clean before loading. This surprises people, but modern enzyme-based detergents actually need a small amount of food residue to work properly the enzymes bind to it and break it down. Putting in completely clean dishes can sometimes result in spotting because the detergent has nothing to work with. That said, leaving rice or dense food particles on dishes can clog the filter and spray arm holes faster, so use some judgment about the size and type of debris you’re leaving on.

What noises from a dishwasher should I be worried about?

A low hum and water movement during a cycle is normal. A hammering or banging sound during the fill phase often points to the inlet valve. Grinding during the wash phase may indicate something caught in the pump. If the spray arms are hitting dishes because of a loading issue, you’ll hear a rhythmic tapping or clunking. Any grinding, buzzing from the motor, or a cycle that xxx stops partway through consistently are signs to get a technician involved rather than continuing to run the machine. Repeated cycles with a mechanical problem can cause more damage than the original issue.

When does it make sense to repair vs. replace a dishwasher?

A general rule of thumb: if the repair cost is more than half the price of a comparable new machine and the dishwasher is already over eight years old, replacement often makes more sense. For a younger machine, most repairs including motor issues, inlet valves, and dispenser replacements are worth doing. A lot of homeowners assume a dishwasher that’s cleaning poorly is finished when it actually just needs a new $10 gasket or a good filter cleaning. Get a diagnosis before deciding.

Wrapping up

A dishwasher not cleaning dishes is frustrating, but the cause is usually something straightforward: a clogged filter that needs monthly attention, spray arm holes blocked by debris, water that isn’t hot enough to activate detergent, or a loading pattern that blocks water flow. Work through those in order and you’ll solve the problem most of the time without spending anything.If you’ve gone through everything here and the machine still isn’t performing, or if you’re dealing with mechanical symptoms like unusual noises, mid-cycle stops, or very low water volume in the tub, that’s when professional help makes sense. At Abbotsford Appliance Repair Pros, we handle dishwasher repair across Abbotsford and the surrounding area give us a call and we’ll figure out what’s going on and what it’ll take to fix it right.

Washing machine not draining — what to check before calling for repairs

You load the washing machine, walk away, and come back to a tub still full of murky water and sopping wet clothes piled inside nobody wants that surprise on laundry day. This guide walks you through the most common reasons a washing machine won’t drain and what you can check yourself before picking up the phone.
Here in Abbotsford, we deal with a pretty wide range of housing stock older homes with plumbing that hasn’t been touched in decades sitting right alongside newer builds with modern appliances. At Abbotsford Appliance Repair Pros, we get calls about washing machine drain problems regularly, and the honest truth is that a good chunk of them turn out to be something the homeowner could have caught themselves with a quick inspection. That’s not us talking ourselves out of a job it’s just the reality, and we’d rather you know it. The other truth? Some drainage problems really do need a professional. A failed drain pump, internal wiring faults, or a deeper plumbing clog aren’t weekend DIY projects for most people. Knowing the difference saves you time, frustration, and sometimes real money.

Key takeaways

  • The most common cause of a washing machine not draining is a clogged filter or blocked drain hose, both of which you can check without any special tools.
  • The drain hose standpipe height matters more than most people realize it should sit between 36 and 96 inches from the floor, and too low can cause water to siphon back into the drum.
  • A faulty lid switch on a top-load washer will prevent the machine from advancing to the drain or spin cycle entirely.
  • Too much detergent creates excess suds that confuse the machine’s sensors and can leave standing water behind a surprisingly common and easy fix.
  • Repairing a washing machine typically runs between $100 and $400, which is often worth it if the machine is under 10 years old.
  • If the problem exists across multiple appliances or your sinks are slow too, the issue may be in your home’s main drain line, not the washer itself.

Washing machine not draining key takeaways infographic

What’s actually stopping your washer from draining

When your washing machine won’t drain water, it almost always comes down to one of four things: a clogged filter, a blocked or kinked drain hose, a mechanical failure inside the machine, or a drain installation problem. Start simple. Most of the time, it’s the filter or the hose and you can check both in under 30 minutes. The washing machine works by using a drain pump to push water out of the tub and through the drain hose, which connects to your home’s waste plumbing. If anything interrupts that path a sock caught in the pump, a hose kinked behind the machine, a filter packed with lint the water has nowhere to go. The machine may stop mid-cycle, or it may complete the cycle but leave your clothes dripping wet. In our experience, front-load washers and top-load washers behave a bit differently when something goes wrong. Front loaders tend to show the problem more clearly standing water is obvious, and the filter is usually accessible through a small panel at the front bottom. Top loaders can be trickier because the drain path is less accessible, and the lid switch adds another variable.

Check the filter first

This is where most drainage calls start, and it’s the right place to begin. The pump filter is designed to catch small items before they reach the drain pump coins, buttons, hair, lint, the occasional forgotten receipt. Over time it gets packed with debris, and water can’t pass through properly. Cleaning washing machine pump filter maintenance 
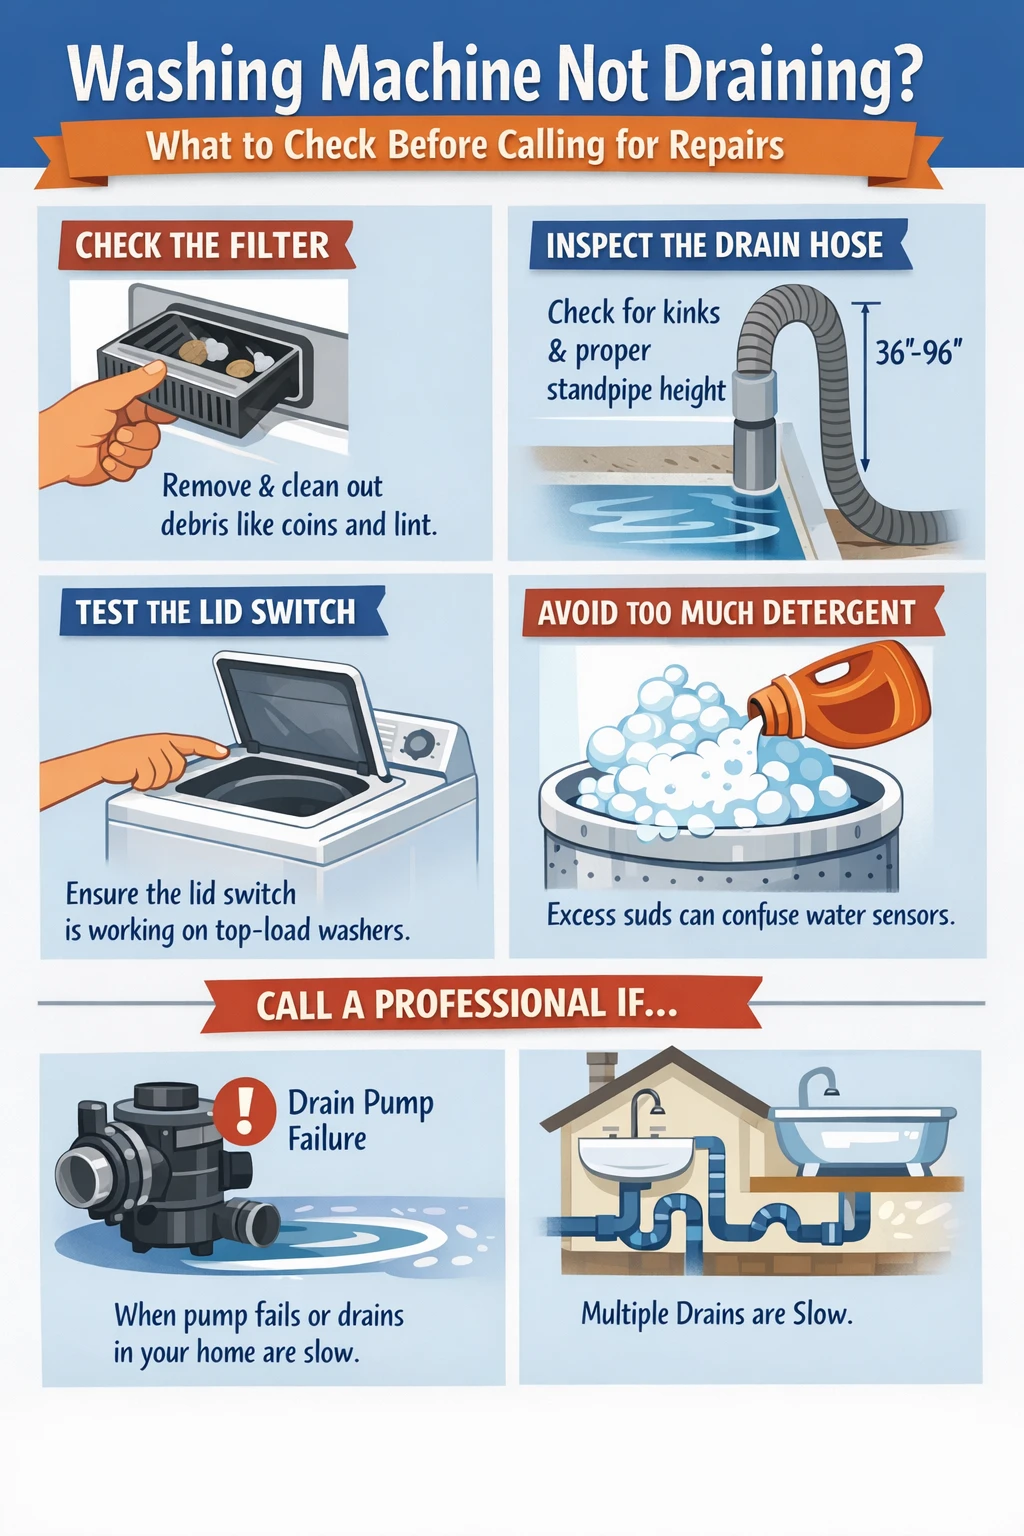
On most front-load washers, the filter sits behind a small panel at the bottom front of the machine. You’ll usually need a flat screwdriver to pop the panel off. Before you open the filter itself, put down some towels and slide a shallow tray or baking dish under the opening. There will be water. Sometimes a lot of it. Open the filter slowly and let it drain into your container before pulling the filter all the way out. Once it’s out, rinse it under running water and use an old toothbrush to clear any gunk stuck in the mesh. While you’re at it, shine a flashlight into the filter housing and fish out anything that got past small items like hairpins or coins can sit just inside and cause intermittent problems. Replace the filter, plug the machine back in, and run a drain cycle to see if that solved it. Top-load washers are a different story. Many newer models either don’t have an accessible filter or the filter is in a location that’s difficult to reach without disassembly. Check your owner’s manual first. If the manual says there’s no user-serviceable filter, skip this step and move on to the drain hose.

Inspect the drain hose

Washing machine drain hose loop standpipe installation 
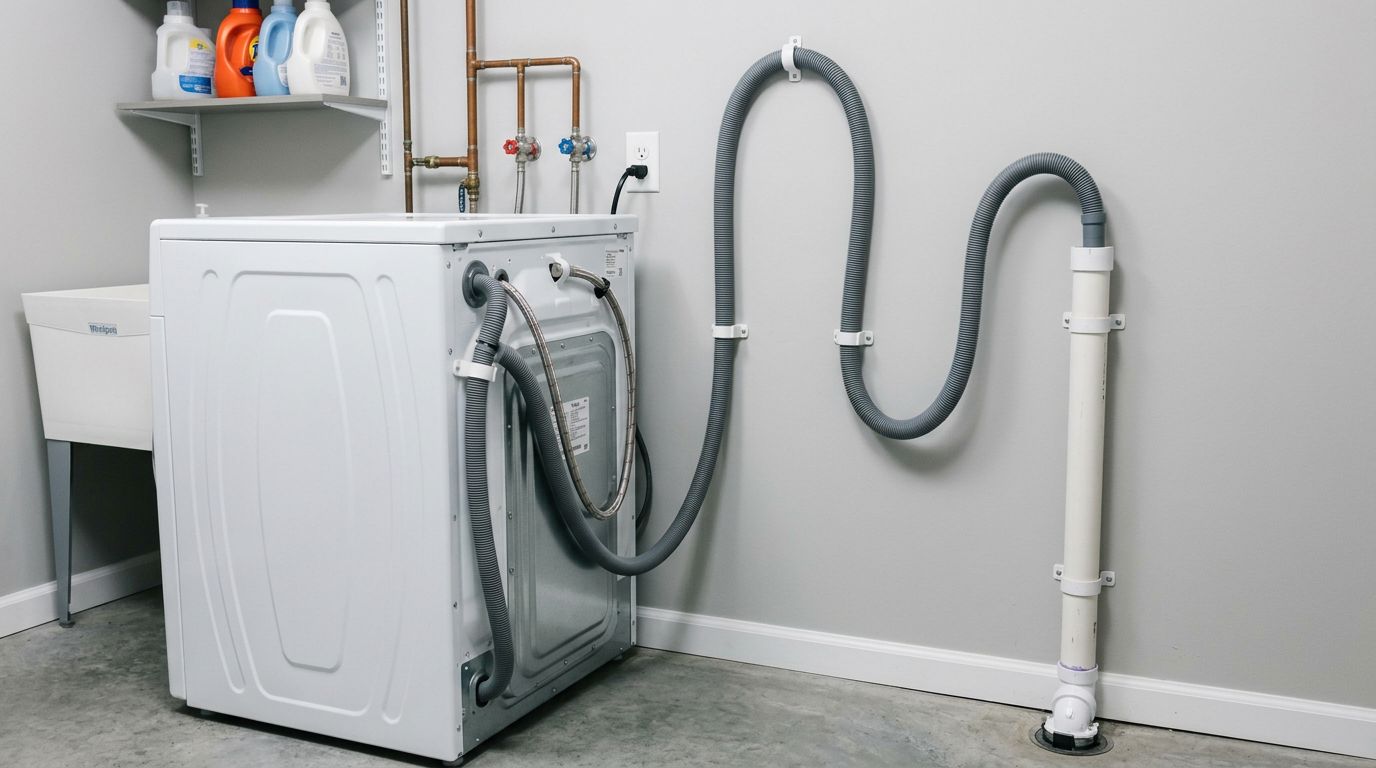
The drain hose runs from the back of your machine to the standpipe or utility sink in your laundry area. Pull the washer away from the wall carefully enough to see the hose, but not so far that you’re straining it. Look for obvious kinks or pinches. A hose that’s been squashed against a wall for years can develop a crease that restricts flow significantly, and straightening it out takes about ten seconds. If the hose looks fine on the outside, the problem might be inside it. Disconnect it from the wall connection (have a bucket ready water will come out), and check the inside for blockages. Clumps of fabric fiber, small clothing items like socks, and accumulated soap residue are all common culprits. You can often clear a partial blockage by taking the hose outside and running a garden hose through it. Now, here’s something that catches a lot of people off guard: the height of the standpipe matters. The drain hose needs to loop up to a minimum height of about 35 to 39 inches before it enters the drain. If the standpipe is too short or the hose drops into the drain pipe too far more than about four inches water will siphon back into the drum during the cycle. The machine may appear to drain, then refill on its own, leaving you with wet clothes and no obvious explanation. We see this fairly often in older homes around Matsqui Village, where laundry setups sometimes haven’t been updated in years. The fix is straightforward: use a clip to secure the drain hose at the proper height, or install a taller standpipe. It’s one of those problems that stumps people for a long time because everything looks fine at a glance. The U.S. Department of Energy’s appliance guidance and most washer manufacturer manuals specify the correct drain height range for this exact reason.

The lid switch and load balance issues

If you have a top-loading washer, the lid switch is worth checking before you go any further. This small plastic switch sits under the lid and tells the machine that the lid is closed so it’s safe to drain and spin. If the switch is damaged or stuck, the machine won’t advance past the wash cycle it just sits there, full of water, doing nothing. Testing it is simple. Open the lid while the machine is running and press the switch down with your finger or a pencil. You should hear an audible click. No click usually means the switch has failed and needs replacing. A working switch can also be dislodged from its mounting over time, so check whether it’s sitting properly in its housing before assuming it’s broken. Load balance is another thing worth ruling out early. A single heavy item a wet bath mat, one large blanket can throw the drum off balance and cause the machine to cut the spin cycle short. The clothes end up soaking wet and there may even be some standing water left behind. Redistribute the load, add a few lighter items to balance it out, and run a drain-and-spin cycle. Sounds too simple, but it works. One more thing on the subject of loads: using too much detergent. Excess suds can actually fool the machine’s water sensors into thinking there’s more water in the drum than there really is, causing it to pause or skip the drain cycle. If you’ve been generous with the soap, try cutting back and see if the problem clears up on its own.

When it’s the drain pump or deeper plumbing

Appliance technician repairing washing machine drain pump If you’ve worked through the filter, the hose, and the lid switch and your washing machine still isn’t draining, the next likely culprits are the drain pump itself or a problem further along in your home’s plumbing. A failing drain pump often gives you warning signs: unusual humming or grinding sounds during the drain cycle, or the pump running continuously without actually moving water. Sometimes the pump impeller the spinning component that moves water gets jammed by a small object that made it past the filter. On front-load washers, you can sometimes access the pump by removing the front or back panel; your owner’s manual will show you the layout. If the pump is jammed, clearing the obstruction may fix it. If the pump has burned out or the motor has failed, it needs to be replaced. Drive belts are another possibility on older machines. The belt connects the motor to the pump, and if it’s cracked, worn, or has snapped entirely, the pump won’t run. Removing the access panel and inspecting the belt visually is straightforward broken belts are obvious. Replacing one is doable for a handy homeowner, but it’s the kind of repair where watching a model-specific video first is genuinely worth your time. If the pump and belt are fine, look at your home plumbing. If your kitchen sink or bathroom drains are also moving slowly, you may have a clog in a shared drain line rather than a washer problem at all. A plumber’s snake can clear many of these, but if the issue is in the main line or involves blocked roof vents (yes, clogged plumbing vents can cause drainage problems), that’s a job for a plumber. For washer-specific repairs, Whirlpool’s support documentation and similar manufacturer resources provide model-specific diagrams that are genuinely useful for identifying pump locations and component names before you take anything apart.

When to reset and when to call

Sometimes a washing machine stops draining because of a simple electronic glitch rather than a physical blockage. Unplugging the machine for 60 seconds and plugging it back in resets the control board and clears minor errors. Some machines, particularly newer front-loaders, have a specific reset sequence involving opening and closing the door multiple times check your manual for model-specific instructions. This won’t fix a clogged filter or a bad pump, but it’s a legitimate first step and costs nothing. If you’ve tried the reset, cleared the filter, checked the hose, and inspected the lid switch and the washer still isn’t draining, it’s time to call someone. Likewise if you’re seeing error codes on the display, smelling burning, noticing water leaking from underneath the machine, or just uncomfortable opening up the panels. There’s no shame in stopping there some of these repairs require specific tools and some mechanical confidence to do safely. Homes in areas like Clearbrook tend to have a mix of machine ages, and an older washer that’s been problematic for a while may actually be near the end of its useful life. Most washing machines last 10 to 13 years. If yours is on the older end of that range and facing a significant repair, it’s worth having an honest conversation about whether repair or replacement makes more financial sense. A technician can usually give you that assessment pretty quickly once they’ve diagnosed the problem. You can also find helpful general maintenance guidance through resources like Health Canada’s home safety resources for keeping your laundry area safe while you’re doing any hands-on inspection.

Frequently asked questions

These are the questions we hear most often when people call in about washer drain problems. Knowing the answers ahead of time might save you a service call or at least help you describe the problem more clearly when you do reach out.

Why is my washing machine not draining but it’s spinning?

The drum can spin even when drainage is incomplete, which is why clothes sometimes come out wet even when no standing water is visible. This usually points to a partial blockage the filter may be partly clogged, or the drain hose may be kinked enough to restrict flow without stopping it entirely. Incorrect detergent levels can also cause this, as excess suds slow drainage without fully blocking it. Check the filter first and reduce detergent if you’ve been using more than the recommended amount.

How do I get the water out before I can fix anything?

The easiest method is to use the drain hose itself. Unplug the machine, pull it from the wall, and disconnect the drain hose from the standpipe. Lower the end of the hose into a bucket placed on the floor gravity will do the work. Have several buckets ready if the drum is full, and raise the hose above drum level when you need to swap buckets so water stops flowing. For front-loaders with an accessible filter and no separate drain hose outlet, use the filter drain tube if the machine has one, or open the filter slowly over a shallow tray.

Can a washing machine drain problem fix itself?

Not really, no. A glitch that responds to a reset might seem like it fixed itself, but if there’s a physical blockage or a failing component, it will come back. We’ve seen homeowners report that the problem went away after they ran a smaller load or a different cycle, only to have the same issue return the following week. It’s worth finding the actual cause rather than waiting it out.

How often should I clean my washer’s drain filter?

Most manufacturers recommend cleaning it every one to three months, or more often if you wash pet bedding, rugs, or anything that sheds a lot of fiber. If you’re not sure how often yours needs attention, cleaning it once a month is a reasonable habit that takes about five minutes and prevents most of the clogging problems we see. Set a reminder on your phone it’s the kind of maintenance task that’s easy to forget until it becomes a problem.

What does it mean when the washer hums but doesn’t drain?

A humming sound during the drain cycle usually means the pump motor is running but something is blocking the impeller the spinning part that actually moves water. This is often a small object caught in the pump, like a coin, a hair clip, or a small piece of clothing. It can also mean the pump motor is running but failing, which produces a similar sound. Access the pump according to your machine’s manual and inspect for obstructions before assuming the pump needs replacement.

Wrapping up

Most washing machine drain problems come down to a few common causes: a clogged filter, a kinked or improperly installed drain hose, a bad lid switch, or an overloaded or unbalanced drum. Working through those checks in order will solve the problem for a lot of homeowners without any professional help needed. Where things get more complicated failed pump motors, drive belts, wiring faults, or home plumbing issues that’s when it makes sense to call in someone who works on these machines regularly. If you’d rather not dig into it yourself, or you’ve worked through these steps and still can’t figure out what’s going on, Abbotsford Appliance Repair Pros handles washer repair across Abbotsford and the surrounding area, along with dryer repair, fridge repair, dishwasher repair, and other home appliance issues. Give us a call and we’ll help you figure out what’s actually going on and what it’ll take to get your machine running properly again.

How to clean your refrigerator coils and why it matters

Your refrigerator has been running constantly, your energy bill keeps creeping up, and you have no idea why – chances are, the condenser coils haven’t been cleaned in years. This guide walks you through exactly how to clean refrigerator coils, why it matters more than most people realize, and how to tell when the job is overdue. [IMAGE PLACEHOLDER FOR IMAGE1]

Most homeowners in Abbotsford never think about their fridge’s condenser coils until something goes wrong. And by then, the compressor has been working overtime for months, sometimes years, running up electricity costs and quietly shortening the appliance’s lifespan. At Abbotsford Appliance Repair Pros, we see this regularly – a fridge that “stopped working” turns out to have coils so packed with dust and pet hair that the compressor finally gave out. It’s one of the most preventable appliance failures there is.

The Fraser Valley climate doesn’t help things. Homes here tend to run their heating systems hard through the cooler months, which stirs up a lot of dust. Add a dog or cat to the mix, and those coils can go from clean to clogged faster than you’d expect. Whether you’re in an older rancher or a newer townhouse, this is one maintenance task that pays for itself.

Key takeaways

  • Dirty condenser coils can reduce your refrigerator’s energy efficiency by up to 30 percent, meaning your fridge burns significantly more electricity just to stay cold.
  • For most households, cleaning the coils every six months is a reasonable schedule – homes with pets or high dust levels should lean toward the shorter end of that range.
  • The whole job takes 15 to 30 minutes and requires only a vacuum with a brush attachment and an inexpensive coil brush, available at most hardware stores for under ten dollars.
  • Always unplug the refrigerator before you start. This is not optional.
  • Coil location varies by model – bottom front, back panel, or top – so check your owner’s manual before you start pulling things apart.
  • Some refrigerator models manufactured after 2001 have sealed condenser systems that don’t require cleaning, so confirm your model before you spend time on a job that isn’t needed.

How to clean refrigerator coils maintenance infographic

What condenser coils actually do

Condenser coils are the part of your refrigerator’s cooling system that releases heat to the outside air. Think of them like a radiator. The refrigerant inside absorbs heat from the food compartment, carries it to the coils, and the coils release that heat into the room. A small fan assists with airflow to keep the process moving.

Dirty refrigerator condenser coils with dust buildup

When dust, lint, and pet hair accumulate on the coils, they act like insulation – trapping the heat instead of letting it escape. The refrigerator’s compressor then has to cycle on more frequently and run longer to compensate. That extra workload adds up on your energy bill, and over time it wears the compressor down prematurely. Compressor failure is usually the point where a repair bill becomes “just buy a new fridge” territory.

In our experience, this is one of those problems that sneaks up on people. The fridge seems fine right up until it doesn’t. There’s rarely a dramatic warning – just a slightly higher electricity bill, food that doesn’t seem quite as cold as it used to be, and a compressor running more than it should.

How to find your refrigerator’s condenser coils

Before you grab any tools, you need to know where your coils are. This varies more than most people expect, and getting it wrong means pulling apart the wrong panel for no reason.

Cleaning refrigerator coils with vacuum brush tutorial

On most modern refrigerators, the condenser coils sit at the bottom front of the unit, behind a removable kickplate or base grille. You pop it off – usually it snaps free by opening the doors, placing your hands at the ends of the grille, and pushing in on the top while pulling up on the bottom. On older models, especially fridges from the 1990s or early 2000s, the coils are often mounted on the back of the unit. Those are easier to spot but harder to reach because you have to pull the fridge away from the wall. A small number of models have the coils at the top, behind an upper panel.

If you’re not sure, the owner’s manual will tell you exactly where to look. Most manufacturers also have this information on their support websites. Whirlpool’s product help documentation, for example, walks through coil location for each model line and includes notes on which models have sealed condensers that don’t require cleaning. GE Appliances has a similar resource. Worth a five-minute check before you start.

One practical note: many fridges with front-bottom coils have wheel stops – essentially brakes – that keep the unit from rolling. If you need to pull the fridge out, look for these behind the kickplate and release them first. A surprising number of people wrestle with a fridge that won’t budge without realizing the wheels are locked.

Step-by-step: how to clean refrigerator coils

[IMAGE PLACEHOLDER FOR IMAGE2]

Alright, let’s get into it. This job looks more intimidating than it is. First things first – unplug the refrigerator from the wall outlet, or shut off the circuit breaker if the outlet is hard to reach. No exceptions here. You’re working near electrical components and the compressor, and you want zero current running through the appliance while you do it.

Once the power is off, remove the kickplate or access panel. For bottom-front coils, snap the grille free as described above. For back-panel coils, you’ll need to pull the fridge straight out from the wall. Do this carefully and in a straight line to avoid running over any water lines or power cords. For top-access models, the front grille panel lifts up to reveal the machine compartment – wear gloves here, because the condenser fins have sharp edges.

Now, the actual cleaning. Start with a vacuum fitted with a brush attachment. Work gently along the grain of the coils – moving with the direction of the fins rather than across them. The goal is to lift the dust away without bending the fins or tubing. For compacted buildup that won’t vacuum off, a refrigerator coil brush is what you need. These are long, flexible brushes designed specifically for this job. GE Appliances lists part number PM14X51, which is 27.5 inches long with 12 inches of bristles – useful if you’re working with back-mounted coils that are hard to reach. Whirlpool recommends their Maintenance Brush, part number 4210463RW, for similar work. Either way, any hardware store coil brush in the under-ten-dollar range will do the job for most residential fridges.

Work the brush through the coils to loosen packed-in debris, then vacuum up what falls loose. Things will get dusty fast, so keep the vacuum close. While the panel is off, clean the panel itself – a quick rinse in the sink with soap and water works fine. Let it dry completely before reattaching it.

Once everything is cleaned and the panel is back in place, plug the fridge back in. That’s it. Fifteen to thirty minutes, start to finish.

If you have pets

[IMAGE PLACEHOLDER FOR IMAGE3]

Pet hair deserves its own mention because it behaves differently than regular household dust. It mats together and compresses into the coils rather than just sitting loosely on them. This creates a denser buildup that restricts airflow more severely, and it accumulates faster. If you have dogs or cats that shed, inspect the coils every three months rather than every six. You may be surprised how quickly they load up again.

Pet hair buildup and refrigerator maintenance for clogged coils

The vacuum-and-brush combination is still the right approach, but you may need to spend more time with the coil brush working through matted hair before the vacuum can pull it all free. Some people in this situation use a stiff-bristle brush first, then vacuum, then brush again. A dust mask is worth wearing if the buildup is heavy.

Signs your coils may already be affecting performance

Sometimes the fridge gives you signals before anything fails outright. The compressor running almost constantly is a common one – you get used to the occasional hum of the fridge cycling on, but if it seems like it never really shuts off, that’s worth investigating. The coils are a logical first place to look.

Food spoiling slightly faster than expected, or the interior temperature feeling warmer than it should, can also point to coil buildup. Same with the outside of the fridge feeling warm to the touch near the bottom or back – that’s the heat that isn’t dissipating properly. None of these symptoms automatically mean the coils are the problem, but they’re a good reason to pull the kickplate and take a look before calling for service.

We get calls from Clearbrook and Auguston about this kind of issue fairly often, particularly in spring when people are doing a more thorough clean of the house and finally get around to pulling the fridge out. The coils they find have sometimes been untouched for three or four years. The fridge is usually still running, but it’s struggling. A good cleaning and it often comes back to normal performance without any parts or repairs needed.

When cleaning isn’t enough

Cleaning the coils fixes the efficiency problem in the large majority of cases. But sometimes the coils are clean and the fridge is still running constantly or not cooling correctly. At that point, you’re likely looking at a different issue – a failing compressor, a refrigerant leak, a faulty thermostat, or a broken evaporator fan. These aren’t DIY fixes for most people.

There’s also the question of models where the coils aren’t accessible to the homeowner at all. Most refrigerators manufactured after 2001 with sealed or “NeverClean” condenser systems fall into this category. The coils are in a location that either doesn’t accumulate debris or can only be serviced by a technician. Check your manual before assuming cleaning is needed.

If you’ve cleaned the coils and the fridge is still running hard, or if you open that kickplate and see something that looks more like a serious mechanical issue than just dust, that’s the point to call someone. Continuing to run a fridge with a failing compressor accelerates the damage and can leave you with a much larger repair bill – or a failed unit entirely – down the road. The ENERGY STAR program run by the U.S. Department of Energy has useful guidance on refrigerator efficiency and when an aging unit may cost more to run than to replace, which is worth a look if your fridge is getting up there in age.

In Abbotsford, older homes in areas like Matsqui Prairie sometimes have fridges that have been in service for 15 or more years. At that age, even clean coils may not be enough to offset a worn compressor. That’s a conversation worth having with a technician before investing in repairs.

Frequently asked questions

These are the questions that come up most often when homeowners start looking into refrigerator coil maintenance. Some of the answers are simpler than people expect.

How often should I clean my refrigerator coils?

Every six months is the standard recommendation for most households. If you have pets that shed, or if your home is dustier than average – near a construction site, for example, or in a home with older ventilation – every three months is more appropriate. The honest answer is that the right interval depends on how fast the coils accumulate debris, which varies a lot from house to house.

The easiest way to calibrate this is to check the coils after your first cleaning, then again three months later. If there’s significant buildup already, shorten the interval. If they’re still fairly clean, six months is probably fine for your situation.

Can dirty coils permanently damage my refrigerator?

Yes, they can. The compressor bears the brunt of the extra workload caused by dirty coils, and compressors aren’t cheap to replace. In many cases, a compressor failure makes the repair cost close to or exceeding the value of the fridge. The good news is that regular coil cleaning is an easy way to avoid putting that kind of stress on the system in the first place.

There have been cases where a fridge stopped cooling entirely because the coils were so clogged the compressor simply overheated and shut down. A good cleaning sometimes gets the unit running again. But if the compressor itself has been damaged from prolonged overheating, cleaning the coils won’t undo that.

Do I need any special tools?

Not really. A vacuum cleaner with a brush attachment handles most of the work. A dedicated coil brush – the long, flexible kind sold at hardware stores – is helpful for dislodging compacted buildup, but it’s not strictly required if the dust is loose. A flathead screwdriver may be needed to remove certain panel types. That’s genuinely it for most fridges. The Consumer Reports appliance maintenance section is a good reference if you want to cross-check tool recommendations for your specific fridge brand or model.

My fridge is against the wall with very little space – do I have to move it?

Only if the coils are on the back. For fridges with front-bottom coils behind a kickplate, you don’t need to move the unit at all. That’s actually one of the advantages of most modern fridge designs. If your coils are on the back, you’ll need to pull it out – but most fridges are on wheels, and once you release the wheel stops, they roll out fairly easily. Just go slowly and watch for the power cord and any water lines if you have an ice maker or water dispenser.

What if I clean the coils and the fridge is still running constantly?

Clean coils rule out the most common cause, but there are others. A worn door gasket that lets warm air in, a faulty thermostat, a malfunctioning evaporator fan, or a refrigerant issue can all cause the same symptom. If the coils are clean and the problem persists, it’s time to have a technician take a look. Continuing to run a fridge with an underlying mechanical issue rarely ends well.

Wrapping up

Cleaning your refrigerator coils is one of those maintenance tasks that takes less than half an hour, costs almost nothing, and can meaningfully extend your appliance’s life while keeping your energy bill in check. The basic approach is consistent regardless of fridge brand: unplug the unit, locate the coils, use a brush and vacuum to clear the debris, reassemble, and plug back in. Do it every six months, or every three if you have pets. Most people who’ve never done it are genuinely surprised at what they find the first time. If you’ve cleaned the coils and things still aren’t right, or if you’re looking at a fridge that needs more than a dust clearing, that’s where professional service makes sense. At Abbotsford Appliance Repair Pros, we handle fridge repair across Abbotsford and the surrounding area – including situations where the coils are the least of the problem. Give us a call and we’ll figure out what’s actually going on.

Speak To A Technician In Abbotsford